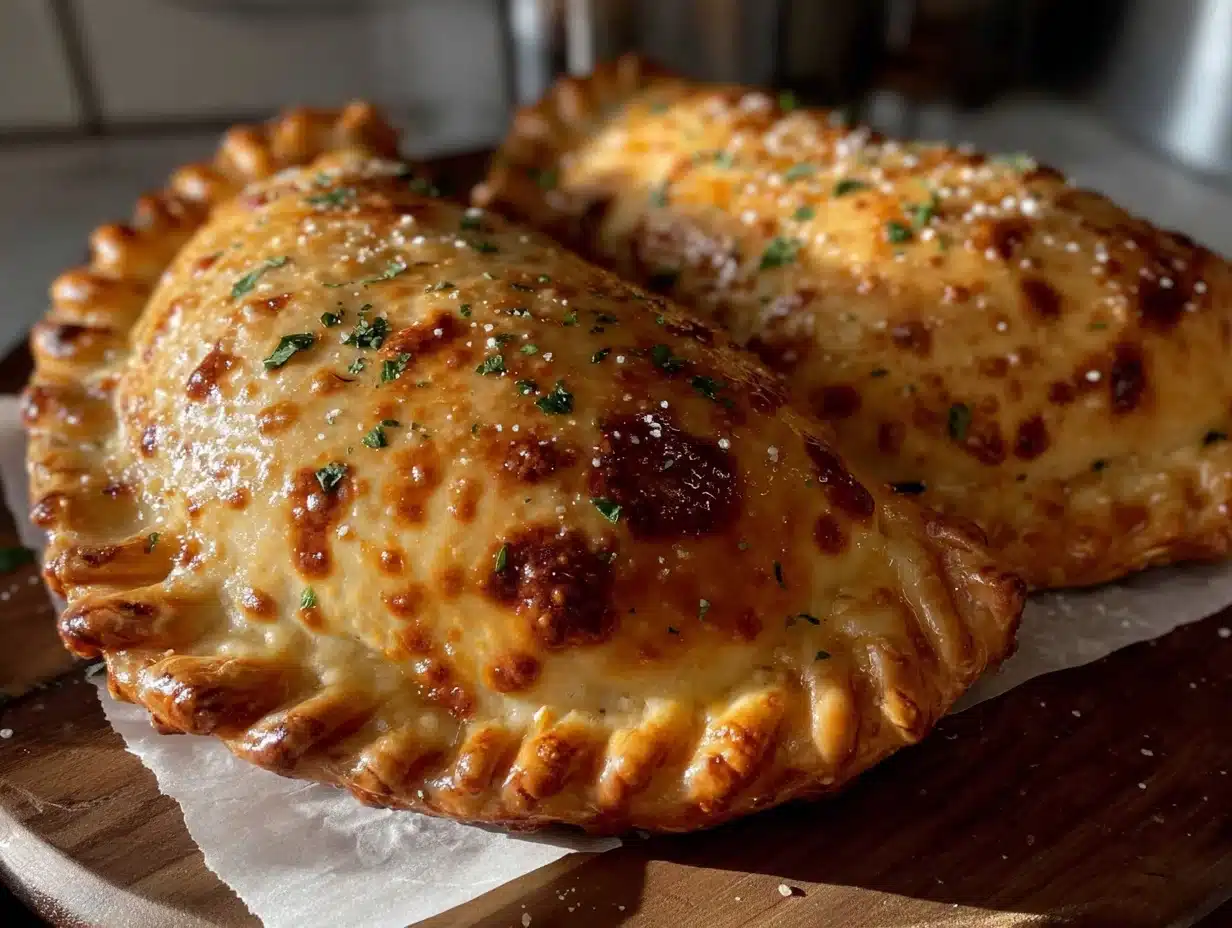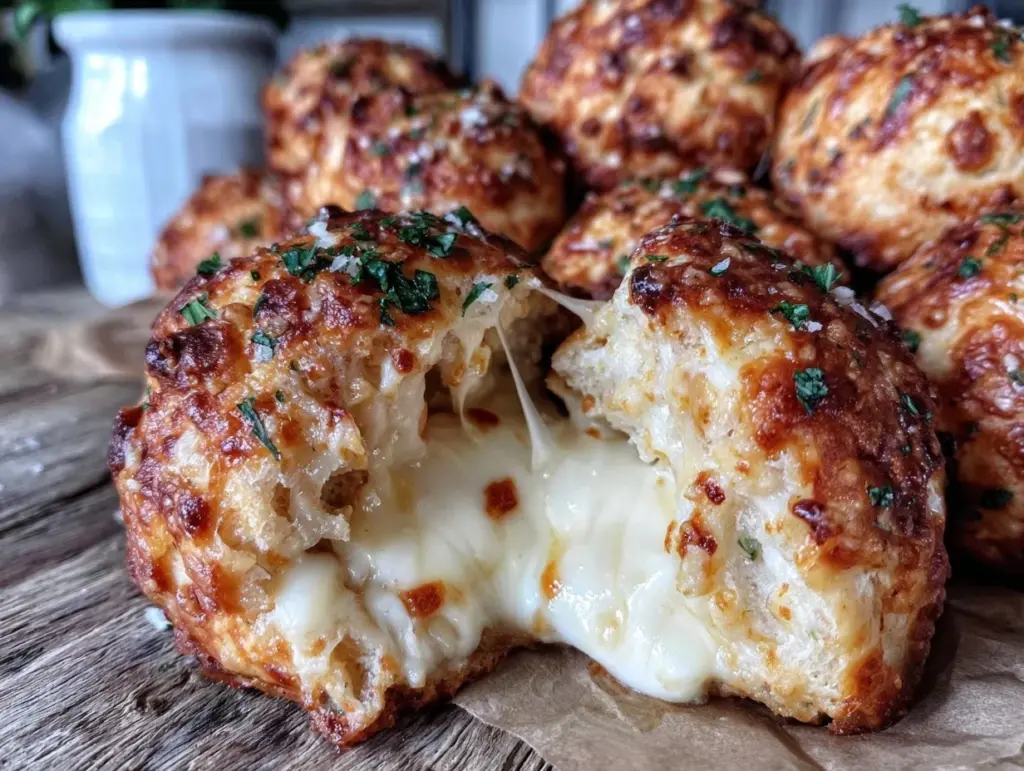
Picture this: warm, golden biscuit bombs bursting with gooey cheese and aromatic garlic butter, melting in your mouth with every bite. Sounds heavenly, doesn’t it? That’s exactly what these cheesy garlic butter biscuit bombs deliver. I first stumbled upon this idea while trying to jazz up dinner rolls for a family gathering, and let me tell you—these pillowy bites were the star of the show! They’re quick, easy, and totally irresistible. If you love the combo of cheese, garlic, and buttery goodness, you’re in for a treat.
Whether you’re hosting a party, whipping up a cozy snack for movie night, or just want to wow your family at dinner, these biscuit bombs are a guaranteed crowd-pleaser. And trust me, once you make them, they’ll become a regular on your recipe rotation!
Why You’ll Love This Recipe
Let me share a few reasons why I’m obsessed with these cheesy garlic butter biscuit bombs:
- Quick & Easy: Ready in under 30 minutes, they’re perfect for busy weeknights or last-minute guests.
- Simple Ingredients: No fancy shopping trips required—everything you need might already be in your pantry and fridge!
- Versatile: Perfect as an appetizer, side dish, or snack. They fit into any occasion seamlessly.
- Kid-Friendly: My kids can’t get enough of these! The cheesy, buttery goodness is a guaranteed hit.
- Irresistible Flavor: The garlic butter combined with melty cheese creates a flavor explosion you’ll crave again and again.
What sets these biscuit bombs apart is how effortlessly delicious they are. The garlic butter adds a rich, savory depth, while the cheese makes every bite indulgent. Plus, they’re a breeze to whip up—no fancy techniques, just easy steps and great results. It’s the kind of recipe that makes everyone happy, whether you’re serving it to friends, picky eaters, or just treating yourself!
What Ingredients You Will Need
This recipe uses simple, everyday ingredients to create the ultimate cheesy garlic biscuit bombs. Here’s what you’ll need:
- Canned Biscuits: You can use store-bought biscuits for convenience. I usually go for flaky or buttery varieties.
- Shredded Cheese: Mozzarella works best for that gooey, stretchy texture, but cheddar or a blend of cheeses can be used too.
- Butter: Unsalted butter, melted, is key for the garlic butter sauce.
- Minced Garlic: Fresh minced garlic adds bold flavor to the butter sauce.
- Fresh Parsley: Finely chopped parsley for a touch of brightness and color.
- Salt: A pinch to balance the flavors.
- Optional: Parmesan cheese for sprinkling on top (because more cheese is always a good idea).
If you’re looking to customize, swap the mozzarella for your favorite cheese or add a sprinkle of Italian seasoning to the garlic butter for extra flavor. It’s a forgiving recipe—make it your own!
Equipment Needed
Here’s the equipment you’ll need to whip up these cheesy garlic butter biscuit bombs:
- Baking Sheet: A sturdy, non-stick baking sheet or parchment paper-lined tray.
- Mixing Bowl: For combining the garlic butter sauce.
- Pastry Brush: Perfect for brushing on the buttery garlic goodness.
- Knife: For cutting biscuits if you want smaller sizes.
- Small Spoon: To help scoop cheese into the biscuits.
If you don’t have a pastry brush, a spoon works fine for drizzling the garlic butter. Easy swaps make this recipe accessible for everyone!
Preparation Method

Follow these simple steps to create the perfect cheesy garlic butter biscuit bombs:
- Preheat your oven to 375°F (190°C). Line a baking sheet with parchment paper or lightly grease it.
- Separate the canned biscuits and gently flatten each one with your hands.
- Place a small pile of shredded cheese (about 1 tablespoon) in the center of each biscuit.
- Carefully fold the edges of the biscuit dough around the cheese, pinching to seal. Roll gently into a ball and place seam-side down on the baking sheet.
- Repeat for all biscuits, spacing them evenly apart on the tray.
- In a mixing bowl, combine the melted butter, minced garlic, parsley, and a pinch of salt. Stir until well mixed.
- Use a pastry brush to generously coat the tops and sides of each biscuit bomb with the garlic butter sauce.
- Optional: Sprinkle a little Parmesan cheese over the tops for extra flavor.
- Bake in the preheated oven for 12-15 minutes, or until the biscuit bombs are golden brown and cooked through.
- Remove from the oven and let them cool slightly before serving. Enjoy warm for the best gooey cheese experience!
Pro tip: If the cheese starts to ooze out while baking, don’t panic—it adds a crispy, cheesy bonus layer to the biscuits!
Cooking Tips & Techniques
Here are some tried-and-true tips to make sure your cheesy garlic butter biscuit bombs turn out perfect every time:
- Seal Tightly: Make sure to pinch the dough tightly around the cheese to keep it from leaking during baking.
- Don’t Overfill: While you want them cheesy, overstuffing can lead to messy explosions. A tablespoon of cheese per biscuit is ideal.
- Use Cold Cheese: Chilled cheese helps prevent premature melting before the biscuits are fully baked.
- Watch the Oven: Keep an eye on the biscuit bombs during the last few minutes of baking to avoid over-browning.
- Customize Your Butter: Add a pinch of chili flakes or smoked paprika to the garlic butter for a spicy kick.
Don’t be afraid to experiment with your favorite flavors. I once added caramelized onions to the cheese filling, and it was a game-changer!
Variations & Adaptations
Want to switch things up? Here are some fun variations to try:
- Seasonal Twist: Add chopped fresh basil and sun-dried tomatoes for a summery vibe.
- Dietary Adjustments: Use gluten-free biscuit dough and dairy-free cheese for a gluten-free, vegan-friendly option.
- Spicy Version: Stuff the biscuits with pepper jack cheese and sprinkle chili flakes on top.
- Sweet & Savory: Mix shredded cheese with a small dollop of honey for a unique flavor combo.
My personal favorite? Adding cooked bacon bits to the cheese filling—because everything’s better with bacon!
Serving & Storage Suggestions
Here’s how to serve and store your biscuit bombs:
- Serving: Serve warm and fresh from the oven. Pair with marinara sauce for dipping or a side salad for a complete meal.
- Storage: Store leftovers in an airtight container in the refrigerator for up to 3 days.
- Reheating: Warm in the oven at 350°F (175°C) for 5-7 minutes or microwave for 15-20 seconds.
- Freezing: Wrap unbaked biscuit bombs in plastic wrap and freeze. Bake directly from frozen, adding 2-3 minutes to the cooking time.
Pro tip: The garlic butter flavor intensifies overnight, making reheated biscuit bombs even tastier!
Nutritional Information & Benefits
Here’s a quick breakdown of the nutritional profile of these cheesy garlic butter biscuit bombs:
- Calories: Approximately 200 calories per biscuit bomb.
- Protein: Packed with protein from the cheese.
- Carbs: Moderate carbs from the biscuit dough.
- Health Benefits: Garlic is known for immune-boosting properties, and parsley adds a dose of antioxidants.
- Dietary Notes: Contains gluten and dairy; adapt for dietary needs as needed.
While these are indulgent, the wholesome ingredients and balanced macros make them a great occasional treat!
Conclusion
If you’re on the hunt for the ultimate cheesy garlic butter biscuit bombs recipe, this is it! With gooey cheese, buttery garlic, and soft biscuits, every bite is pure comfort. I love how easy this recipe is to customize—there’s endless room for creativity while still being foolproof.
Give this recipe a try at your next gathering or cozy night in. I promise it’ll become a favorite in your home, just like it has in mine! Don’t forget to share your unique twists or let me know how they turned out in the comments below. Happy baking!
FAQs
Can I use homemade biscuit dough?
Absolutely! If you prefer to make your biscuit dough from scratch, it works just as well. Just ensure you roll it out and portion it into even pieces for stuffing.
What’s the best cheese to use?
Mozzarella is my go-to for its stretchiness, but cheddar, gouda, or even cream cheese are delicious alternatives.
Can I make these ahead of time?
Yes! You can prepare the biscuit bombs, store them in the fridge, and bake them when ready. Or, freeze them before baking and cook directly from frozen.
How do I prevent the cheese from leaking out?
Make sure to seal the biscuit dough tightly around the cheese, and avoid overstuffing. A tablespoon of cheese is just right!
What can I serve with these biscuit bombs?
They pair perfectly with marinara sauce, ranch dressing, or a zesty garlic dip. Serve them alongside a fresh salad or hearty soup to complete the meal.
Pin This Recipe!


Flavorful Cheesy Garlic Butter Biscuit Bombs Recipe
- Total Time: 25 minutes
- Yield: 8 biscuit bombs 1x
Description
Warm, golden biscuit bombs bursting with gooey cheese and aromatic garlic butter, perfect for any occasion. Quick, easy, and totally irresistible!
Ingredients
- 1 can of flaky or buttery store-bought biscuits
- 1 cup shredded mozzarella cheese (or cheddar/cheese blend)
- 4 tablespoons unsalted butter, melted
- 2 cloves fresh minced garlic
- 2 tablespoons finely chopped fresh parsley
- 1/4 teaspoon salt
- Optional: grated Parmesan cheese for topping
Instructions
- Preheat your oven to 375°F (190°C). Line a baking sheet with parchment paper or lightly grease it.
- Separate the canned biscuits and gently flatten each one with your hands.
- Place a small pile of shredded cheese (about 1 tablespoon) in the center of each biscuit.
- Carefully fold the edges of the biscuit dough around the cheese, pinching to seal. Roll gently into a ball and place seam-side down on the baking sheet.
- Repeat for all biscuits, spacing them evenly apart on the tray.
- In a mixing bowl, combine the melted butter, minced garlic, parsley, and a pinch of salt. Stir until well mixed.
- Use a pastry brush to generously coat the tops and sides of each biscuit bomb with the garlic butter sauce.
- Optional: Sprinkle a little Parmesan cheese over the tops for extra flavor.
- Bake in the preheated oven for 12-15 minutes, or until the biscuit bombs are golden brown and cooked through.
- Remove from the oven and let them cool slightly before serving. Enjoy warm for the best gooey cheese experience!
Notes
[‘Seal the dough tightly around the cheese to prevent leakage during baking.’, ‘Avoid overstuffing the biscuits to prevent messy explosions.’, ‘Use cold cheese to prevent premature melting.’, ‘Customize the garlic butter with chili flakes or smoked paprika for extra flavor.’, ‘Reheat leftovers in the oven at 350°F (175°C) for 5-7 minutes or microwave for 15-20 seconds.’]
- Prep Time: 10 minutes
- Cook Time: 15 minutes
- Category: Appetizer
- Cuisine: American
Nutrition
- Serving Size: 1 biscuit bomb
- Calories: 200
- Sugar: 2
- Sodium: 300
- Fat: 10
- Saturated Fat: 6
- Carbohydrates: 20
- Fiber: 1
- Protein: 5
Keywords: cheesy garlic butter biscuit bombs, appetizer, snack, easy recipe, kid-friendly, party food