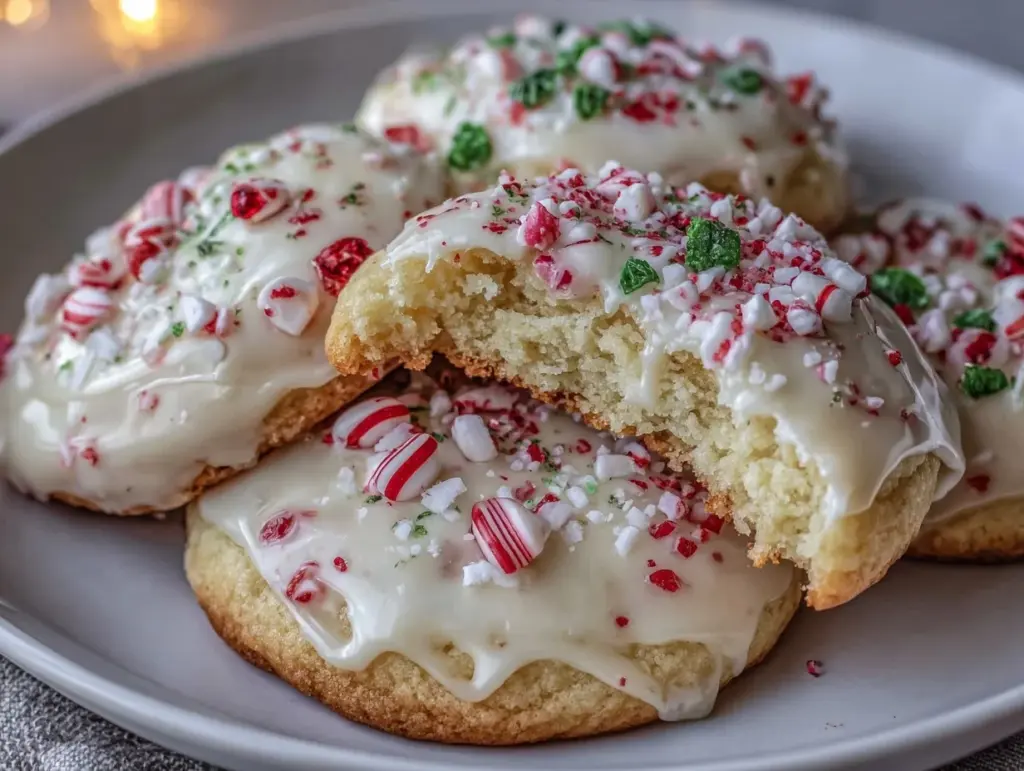
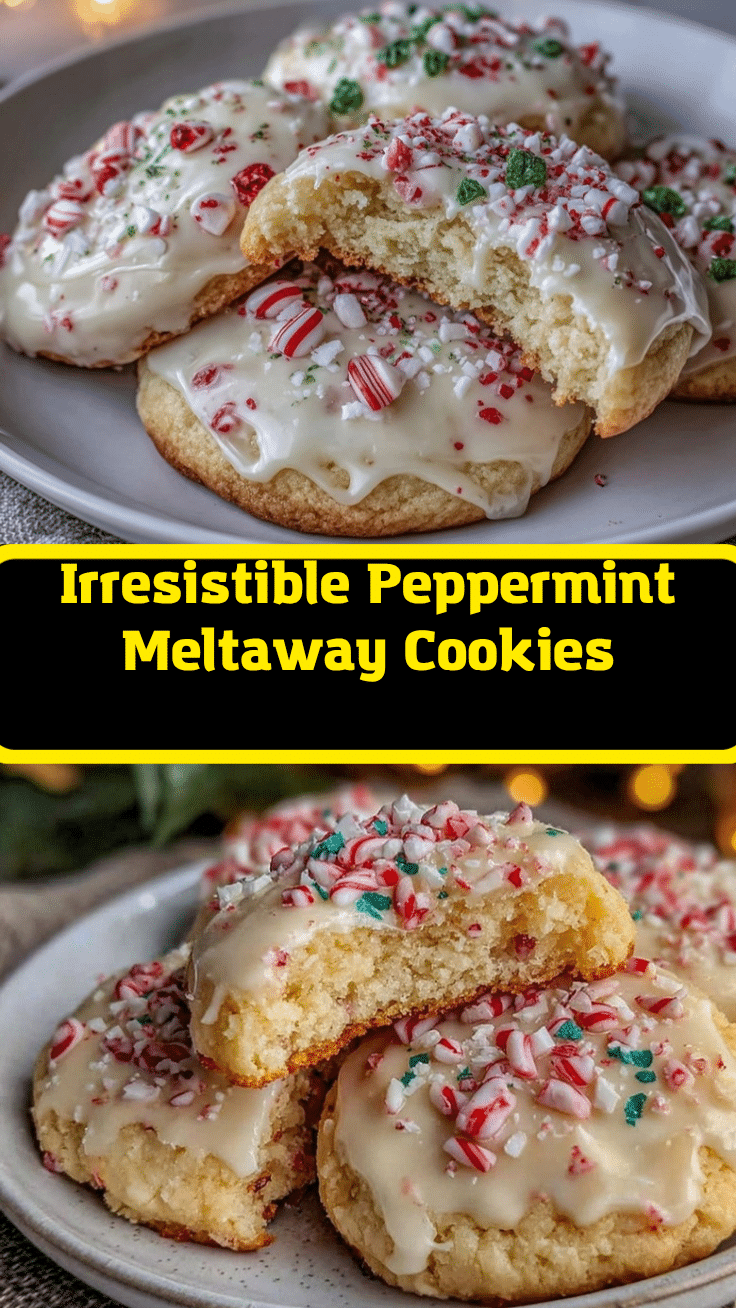
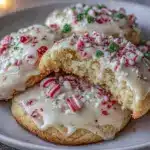
The first whiff of peppermint always reminds me of cozy winter evenings, twinkling lights, and the sound of laughter echoing through the house. These flavorful peppermint meltaways are more than just cookies—they’re little bites of holiday magic. Soft, buttery, and topped with a festive peppermint glaze, they practically melt in your mouth. Whether you’re baking for a cookie exchange, a holiday party, or just to treat yourself, this recipe is guaranteed to become a seasonal favorite.
I first discovered peppermint meltaways during a holiday baking marathon with my sister. We were trying to outdo each other with festive treats, and I stumbled upon this gem. Over the years, I’ve tweaked it to make it even more irresistible. The best part? They’re easy enough for beginners yet impressive enough to wow your guests. Trust me, once you make these, you’ll be adding them to your holiday baking lineup every year!
Why You’ll Love This Recipe
- Super Festive: The bright peppermint flavor and snowy glaze scream holiday cheer.
- Easy to Make: These cookies come together in under an hour and don’t require any fancy techniques.
- Perfect Texture: They’re tender, buttery, and melt in your mouth—you won’t be able to eat just one!
- Fun to Decorate: The peppermint glaze and crushed candy canes make them as fun to decorate as they are to eat.
- Great for Gifting: Pack them up in cute tins or boxes for the perfect homemade holiday gift.
What sets these cookies apart is their delicate, melt-in-your-mouth texture paired with the refreshing zing of peppermint. Plus, they’re versatile—you can make them as simple or as fancy as you want. Add sprinkles, drizzle chocolate, or keep them classic with crushed candy canes. No matter how you style them, they’ll be a hit!
What Ingredients You Will Need
This recipe uses simple ingredients that you might already have in your pantry. Let’s break it down:
- Butter: Unsalted and softened. This is the base of the cookie’s buttery flavor.
- Powdered Sugar: Creates that melt-in-your-mouth texture and is used in both the dough and glaze.
- Vanilla Extract: Adds a warm undertone to balance the peppermint.
- Peppermint Extract: The star of the show! Be careful not to overdo it—peppermint is potent.
- All-Purpose Flour: Gives the cookies structure while keeping them soft and crumbly.
- Cornstarch: This is the secret to the meltaway texture—it keeps the cookies tender and light.
- Milk: Just a splash for the glaze to get the perfect consistency.
- Crushed Candy Canes: For decorating! They add crunch and a pop of color.
You can swap out peppermint extract for another flavor if you prefer—for instance, almond or orange extract would be lovely. And if you need a gluten-free option, use a 1:1 gluten-free flour blend.
Equipment Needed
Here’s what you’ll need to make these delightful holiday cookies:
- Mixing Bowls: One for the dough and one for the glaze.
- Hand Mixer or Stand Mixer: To cream the butter and sugar smoothly.
- Whisk: For mixing the glaze.
- Baking Sheets: Line them with parchment paper for easy cleanup.
- Cooling Rack: Essential for letting the cookies cool completely before decorating.
- Spatula: For scraping down the sides of your mixing bowl.
- Measuring Cups and Spoons: Precision is key for baking.
If you don’t have a stand mixer, don’t worry! A sturdy wooden spoon can work in a pinch, but it’ll take a bit more effort.
Preparation Method

- Preheat Your Oven: Set your oven to 350°F (175°C) and line your baking sheets with parchment paper.
- Mix the Dough: In a large mixing bowl, beat 1 cup (227g) of unsalted butter and 1 cup (120g) of powdered sugar until light and fluffy (about 2-3 minutes).
- Add Flavor: Mix in 1 teaspoon of vanilla extract and 1/2 teaspoon of peppermint extract. Taste and adjust if you’d like a stronger peppermint flavor, but don’t overdo it!
- Add Dry Ingredients: Gradually mix in 2 cups (250g) of all-purpose flour and 1/4 cup (30g) of cornstarch until fully combined. The dough should be soft and slightly crumbly but hold together when pressed.
- Shape the Cookies: Roll the dough into 1-inch (2.5 cm) balls and place them on your prepared baking sheets, spacing them 2 inches apart.
- Bake: Bake for 12-15 minutes, or until the edges are just starting to turn golden. Don’t overbake—these cookies are meant to be soft!
- Cool Completely: Let the cookies cool on the baking sheet for 5 minutes, then transfer them to a cooling rack.
- Make the Glaze: In a small bowl, whisk together 1 cup (120g) of powdered sugar, 2 tablespoons of milk, and 1/4 teaspoon of peppermint extract until smooth. Add more milk a teaspoon at a time if the glaze is too thick.
- Decorate: Once the cookies are completely cool, drizzle the glaze over them and sprinkle crushed candy canes on top for a festive finish.
These cookies are best enjoyed after the glaze has set, so let them rest for 15-20 minutes before serving.
Cooking Tips & Techniques
Here are some tips to make your peppermint meltaways turn out perfectly:
- Don’t Skip the Softened Butter: Soft butter is key for achieving the creamy texture of the dough.
- Use Fresh Candy Canes: Stale candy canes won’t have the same crunch or flavor—so make sure they’re fresh.
- Chill the Dough: If your kitchen is warm, chill the dough for 15-20 minutes before shaping to prevent sticking.
- Ditch the Overbaking: The cookies should remain pale with slightly golden edges. Overbaking will make them crumbly instead of melt-in-your-mouth soft.
- Evenly Crush Candy Canes: Place them in a resealable bag and use a rolling pin to crush them into small, uniform pieces.
Remember, baking is all about patience and precision. Don’t rush the process, and your cookies will thank you with incredible flavor and texture!
Variations & Adaptations
Want to switch things up? Here are some fun ideas:
- Chocolate Peppermint Meltaways: Add 1 tablespoon of unsweetened cocoa powder to the dough for a chocolatey twist.
- Gluten-Free Option: Substitute all-purpose flour with a gluten-free flour blend. Ensure the blend is suitable for baking.
- Seasonal Swaps: Replace peppermint extract with lemon or orange extract for a citrusy flavor. You can even use colored sugar instead of candy canes for decoration.
- Nutty Addition: Fold in chopped pecans or walnuts into the dough for a little crunch.
- Festive Shapes: Use a cookie cutter to create holiday shapes like stars or snowflakes before baking.
Feel free to experiment—these cookies are versatile and adapt beautifully to different flavors and diets.
Serving & Storage Suggestions
These peppermint meltaways are best served at room temperature, allowing the buttery texture to truly shine. Arrange them on a festive platter with sprigs of fresh mint or small ornaments for extra holiday flair. Pair them with a steaming cup of cocoa or a glass of eggnog for the ultimate cozy treat.
To store, place the cookies in an airtight container. They’ll stay fresh at room temperature for up to 5 days. For longer storage, freeze them in a single layer and transfer to a freezer-safe container. They’ll keep well for up to 3 months. To enjoy, simply let them thaw at room temperature or warm them slightly for that fresh-from-the-oven feel.
Nutritional Information & Benefits
While these peppermint meltaways are definitely a treat, they’re made with simple ingredients and no artificial flavors. Each cookie is approximately 120 calories, with 6 grams of fat, 15 grams of carbohydrates, and 1 gram of protein. They’re a great option for those looking for a festive dessert that’s indulgent but portion-controlled.
Peppermint has its own health perks, too—it’s known to aid digestion and provide a refreshing burst of flavor. Just be mindful of the sugar content if you’re watching your intake.
Conclusion
If you’re looking for a festive, crowd-pleasing cookie recipe, these flavorful peppermint meltaways are a no-brainer. With their melt-in-your-mouth texture and bright peppermint glaze, they’re everything a holiday cookie should be. Plus, they’re simple enough to whip up in no time, leaving you with more moments to enjoy the season.
Give this recipe a try and make it your own—add your favorite flavors or decorations, and share your creations in the comments below. I’d love to hear how you’re incorporating these cookies into your holiday traditions!
Happy baking, and may your holidays be as sweet and magical as these peppermint meltaways!
FAQs
Can I make peppermint meltaways ahead of time?
Yes! These cookies freeze beautifully. Just store them in an airtight container and freeze for up to 3 months. Thaw at room temperature before serving.
Can I use margarine instead of butter?
While margarine can be used, I highly recommend sticking to butter for the best flavor and texture.
How do I crush candy canes without making a mess?
Place candy canes in a resealable plastic bag and gently crush them using a rolling pin. This keeps the mess contained and ensures even pieces.
Can I use other flavors besides peppermint?
Absolutely! Swap peppermint extract for almond, vanilla, or citrus extracts for a different twist.
Why are my cookies crumbly?
Crumbly cookies usually mean overbaking or using too much flour. Make sure to follow the recipe measurements accurately and keep an eye on the baking time!
Pin This Recipe!
Flavorful Peppermint Meltaways: Easy Holiday Cookies Recipe
- Total Time: 35 minutes
- Yield: 24 cookies 1x
Description
Soft, buttery cookies topped with a festive peppermint glaze that melt in your mouth. Perfect for holiday parties, cookie exchanges, or gifting.
Ingredients
- 1 cup (227g) unsalted butter, softened
- 1 cup (120g) powdered sugar
- 1 teaspoon vanilla extract
- 1/2 teaspoon peppermint extract
- 2 cups (250g) all-purpose flour
- 1/4 cup (30g) cornstarch
- 2 tablespoons milk
- 1 cup (120g) powdered sugar (for glaze)
- 1/4 teaspoon peppermint extract (for glaze)
- Crushed candy canes (for decorating)
Instructions
- Preheat your oven to 350°F (175°C) and line your baking sheets with parchment paper.
- In a large mixing bowl, beat 1 cup (227g) of unsalted butter and 1 cup (120g) of powdered sugar until light and fluffy (about 2-3 minutes).
- Mix in 1 teaspoon of vanilla extract and 1/2 teaspoon of peppermint extract. Taste and adjust if you’d like a stronger peppermint flavor.
- Gradually mix in 2 cups (250g) of all-purpose flour and 1/4 cup (30g) of cornstarch until fully combined. The dough should be soft and slightly crumbly but hold together when pressed.
- Roll the dough into 1-inch (2.5 cm) balls and place them on your prepared baking sheets, spacing them 2 inches apart.
- Bake for 12-15 minutes, or until the edges are just starting to turn golden. Don’t overbake—these cookies are meant to be soft!
- Let the cookies cool on the baking sheet for 5 minutes, then transfer them to a cooling rack.
- In a small bowl, whisk together 1 cup (120g) of powdered sugar, 2 tablespoons of milk, and 1/4 teaspoon of peppermint extract until smooth. Add more milk a teaspoon at a time if the glaze is too thick.
- Once the cookies are completely cool, drizzle the glaze over them and sprinkle crushed candy canes on top for a festive finish.
- Let the cookies rest for 15-20 minutes before serving to allow the glaze to set.
Notes
[‘Softened butter is key for achieving the creamy texture of the dough.’, ‘Use fresh candy canes for better flavor and crunch.’, ‘Chill the dough for 15-20 minutes if your kitchen is warm to prevent sticking.’, ‘Avoid overbaking to keep the cookies soft and tender.’, ‘Crush candy canes evenly by placing them in a resealable bag and using a rolling pin.’]
- Prep Time: 20 minutes
- Cook Time: 15 minutes
- Category: Dessert
- Cuisine: American
Nutrition
- Serving Size: 1 cookie
- Calories: 120
- Sugar: 8
- Sodium: 50
- Fat: 6
- Saturated Fat: 3.5
- Carbohydrates: 15
- Protein: 1
Keywords: peppermint cookies, holiday cookies, Christmas cookies, festive dessert, easy baking, peppermint glaze